Plan
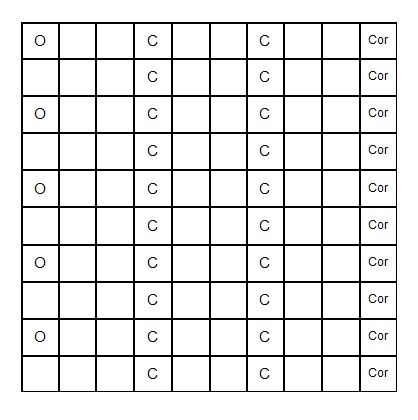
Firstly, use the “Grow a soup bed” activity. Once you have chosen your soup recipe and seeds, you can plan a soup bed by using a 1x1 metre grid like the one below. This will help you plan out the distances required between plants, which can be found on the back of the vegetable and flower seed packets.
This grid will allow you to measure accurately when planting and allow you to scale up the bed easily if you have a larger growing space or scale it down if you are using pots. For example, you can scale it down to a pot with a diameter of 20 or 40cm, however if you have a larger space you could scale up to a 2x2 metre or 4x4 metre bed.

Each box in the grid above is 1x1 cm. When however, it is scaled to 1 metre each box is 10cm. This allows you plan your seed sowing accurately.
Here are two example soup bed plans that we have tried and tested on our allotment:
Minestrone

In our Minestrone soup bed we built an A frame structure for the beans to grow up. This supported them and allowed the beans to climb. We also created a little fenced in area for the potatoes with sticks and string, as they tend to flop over the taller the plant gets especially when they are in flower. This prevented them shading out the garlic and bean plants growing beside them.
Carrot and Coriander

Our Allotment Experince
At the RHS Wisley Garden Allotments, we have been growing our Soup Beds since March. We planned our soup beds out in January, then in February we sourced all our vegetable and flower seeds, potatoes, onion and garlic sets (bulbs). Then once the frost was starting to pass in early to mid-March we started by chitting our potatoes on our windowsills and planting out our onion and garlic sets into our planned grids. By mid to late March we started to sow seeds in trays and pots that need to be germinated indoors and allowed to grow, such as the beans and celery. Then as April came around we started sowing seeds directly into our soup beds, we started sowing carrots and planting out the chitted potatoes. In May we planted out our beans, celery and sowed the coriander all while keeping on top of the weeds and regularly watering the plots. Over June and July, we kept watering our allotment due to the dry weather and had to continue weeding and watching our crops grow, at times it seemed like they were doubling their size in a week.
As August and September came around it was time to start harvesting, drying and storing our beans, onions, garlic and potatoes ready for use in our soup making. Crops like the celery and carrots where left in their beds until a few days before the Big Soup Share week started so they could be washed and prepared ready for being added to our tasty soups. The coriander that we had let go to seed (as it had bolted and flowered early due to the very hot summer sunshine) was left in the bed and we slowly collected the seeds as they dried in an old herb jar.